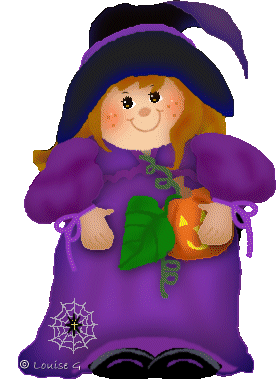
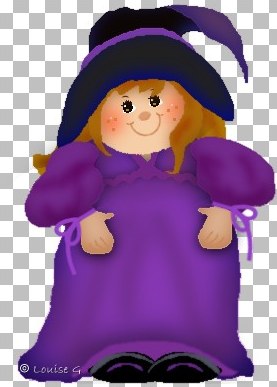
Sweet Halloween witch.
When it is Halloween, you "must" have a
witch also.
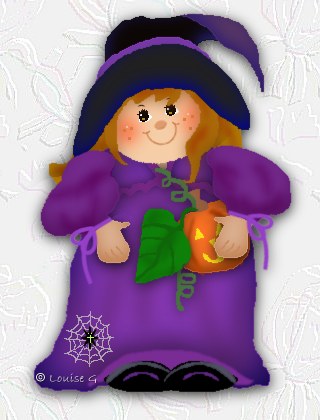
I have made this nice little witch for you.
Get the Selections here and zip them up in your PSP Selections folder.
Zip the face and spidersweb into your PSP Image folder.
Start with a New Image, 400 x 400, transp,
16 mill.
New Layer. Call it Neck. Selections, Load from disk, Halloweenwitch, neck.sel.
Flood Fill with color #DCB192. Deselect.
New Layer. Call it Hair1. Selections, Load from disk,
hair1.sel.
Flood Fill with color #AE7604. Keep it selected.
New Layer. Airbrush2, color #904F0A and #A64403. Make some lines on the hair
like this.
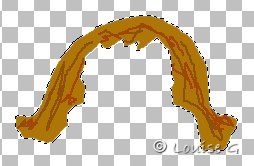
Effects, Blur, Gaussian Blur3. Deselect.
Close Layer Neck. Layers, Merge, Merge Visible. Call it Hair1.
New Layer. Call it Dress. Selections, Load from disk,
dress.sel.
Flood Fill with color #8637B3. Keep it selected. Selections, Float. Effects, 3D,
Cutout as below.
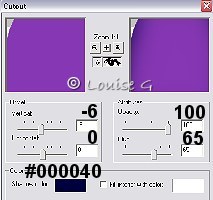
Keep it still selected.
New Layer. Call it Dress-shadows. Airbrush9, color #5F0660. Make some lines on the dress like this.
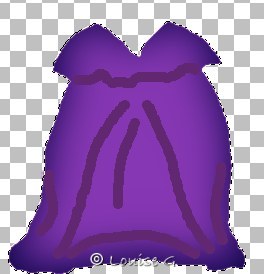
Effects, Blur, Gaussian Blur9. Deselect.
New Layer. Call it Dressrims. Selections,
Load from disk, dressrims.sel.
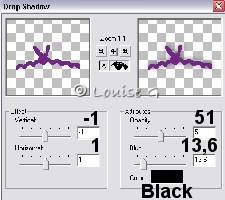
Flood Fill with color #732784. Deselect. Effects, 3 D, Drop Shadow as below.
New Layer. Selections,
Load from disk, dressrim2.sel.
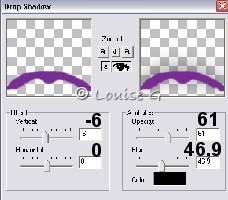
Flood Fill with color #782C94. Deselect. Effects, 3 D, Drop Shadow as below.
Close Layer Hair1. Layers, Merge, Merge Visible. Call it
Dress.
New Layer. Call it Sleeves. Selections,
Load from disk, sleeves.sel.
Flood Fill with color #732784. Keep it selected. New Layer. Airbrush3, color
#5F0660.
Make some lines for the shadow on the sleeves like this.
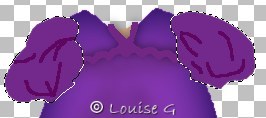
Effects, Blur, Gaussian Blur5. Keep it
selected.
Close all layers except this layer and Layer Sleeves.
Layers, Merge, Merge Visible. Call it Sleeves.
Selections, Float, Effects, 3D, Cutout as below.
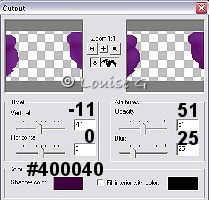
Keep it selected. New Layer. Selections, Modify, Contract by 2.
Effects, 3D, Drop Shadow as below.
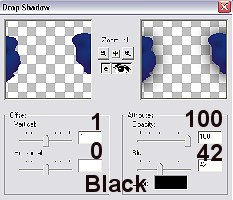
Deselect.
Freehand Tool. Mark
what you will delete.
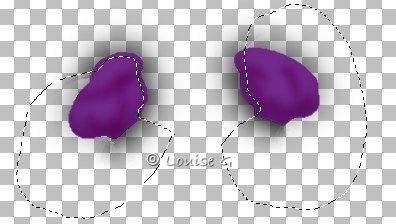
We will only keep the shadows on the inner part of the sleeves. Delete. Deselect.
Close Layers Hair1 and Dress. Layers, Merge, Merge Visible. Call it Sleeves.
New Layer. Call it Shoe. Selections, Load
from disk, shoe.sel.
Flood Fill with black color. Deselect.
New Layer. Selections, Load from disk,
shoeshadow.sel.
Flood Fill the lower selection with color #6B2D93 and the upper selection with
color #505162.

Effects, Blur, Gaussian Blur1. Deselect.
Layers, Merge, Merge Visible. Duplicate, Image Mirror.
Close all Layers except this layer and layer Shoe. Layers, Merge, Merge Visible. Call it Shoes.
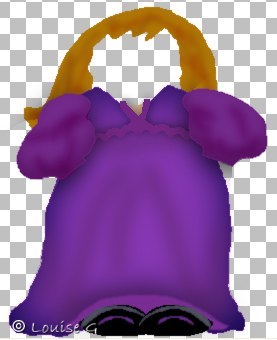
This is what you will have now.
Stand on Layer Dress. New Layer. Call it
Hands. Selections,
Load from disk, hands.sel.
Flood Fill with color #DCB192. Selections, Float. Effects, 3D, Cutout as before,
but change color to #A04604. Deselect.
New Layer. Call it
Fingers. Selections,
Load from disk, fingers.sel.
Flood Fill with color #C78B5F. Deselect.
Close all layers except Layer Hands and Fingers.
Layers, Merge, Merge Visible. Call it Hands.
Effects, 3D, Drop Shadow as below.
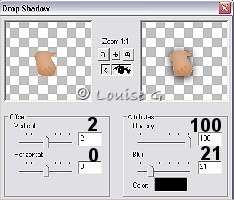
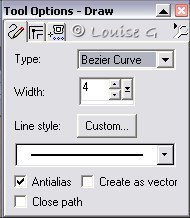
Stand on Layer Sleeves. New Layer. Call it
Bow. Draw Tool, Bezier curve.
Background closed. Color #9243C2.
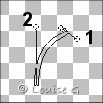
Make three clicks and you will have a nice loop.
First click is where I have marked with 1, then click
at 2 and 3 and there it is.

Take your Mover and put it in place at the
end of the sleeve.
Duplicate the loop and put it also in place beside the first loop.
Turn it a little with Deformation Tool so it fits where you want it to be.
New Layer. Draw Tool, Bezier Curve 4. Draw a small line. Click at 1 and then at 2.
Put this ribbonsend at the loops. Turn it
with Deformation Tool if you like.
New Layer. The same color and Bezier settings. Make a rim along the sleeves end.
First left click and then right click on the same spot and you will have the
line.

Put it in place. You might have to use Deformation Tool to turn the band a bit. It will now look like this.

Close all Layers except these bow and band
layers.
Layers, Merge, Merge Visible. Call it Bow. Duplicate, Image, Mirror and put it
on the other sleeve.
You might use Deformation Tool here also. Zoom the picture and have a look.
Close all Layers except these two Bow Layers. Layers, Merge, Merge Visible. Call
it Bows.
New Layer. Call it Head. Selections,
Load from disk, head.sel.
Flood Fill with color #F5CEA7. Keep it selected.
New Layer. Call it Cheeks. Airbrush 2. Color #F5CEA7. Make some red on the cheeks.
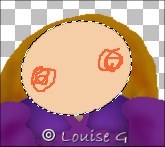
Effects, Blur, Gaussian Blur9. Deselect.
New Layer. Call it Face. Copy and Paste the face you got
in the zip.
New Layer. Call it Hair2. Selections,
Load from disk, hair2.sel.
Flood Fill with color #A96809. Airbrush2, color #A64403. Make some lines on the hair.
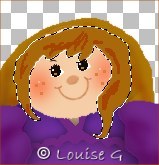
Effects, Blur, Gaussian Blur3. Close all
Layers except these two hair layers.
Layers, Merge, Merge Visible. Call it Hair2. Deselect.
Effects, 3D, Drop Shadow.
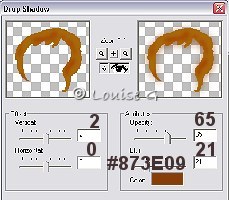
Now when we have got the hair in its place, you can place the face right.
Use the
Mover to put the face where you like it to be.
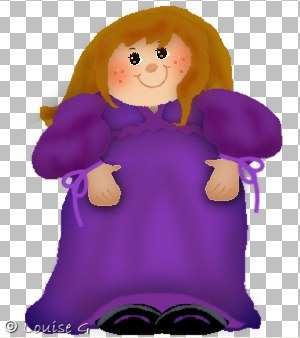
Close all Layers except Head, Cheeks and Face Layers. Layers, Merge, Merge Visible. Call it Head.
This is what you will have so far.
Stand on Layer Hair2.
New Layer. Call it Hattop1. Selections,
Load from disk, hattop1.sel.
Flood Fill with color #0C0604. Selections, Float.
Effects, 3D, Cutout as before, but change color to #4040FF. Deselect.
New Layer. Call it Hattop2. Selections,
Load from disk, hattop2.sel.
Flood Fill with color #593763. Selections, Float.
Effects, 3D, Cutout as before, but change color to #000080. Deselect.
New Layer. Call it Band. Selections,
Load from disk, band.sel.
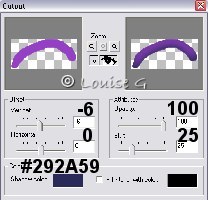
Flood Fill with color #943EC6. Selections, Float.
Effects, 3D, Cutout.
Deselect.
New Layer. Call it Hatbrim. Selections,
Load from disk, hatbrim.sel.
Flood Fill with color #202020. Selections, Float.
Effects, 3D, Cutout as before. Deselect.
Close all layers except those hat and band layers. Layers, Merge, Merge Visible.
Call it Hat.
Stand on Layer Sleeves. Layers, Arrange, Bring to top.
Stand on Layer Bows. Layers, Arrange, Bring to top.
This is what you will have now.
Now we will give her a pumpkin to hold.
Stand on Layer Dress.
New Layer. Call it Pumpkin. Selections,
Load from disk, pumpkin.sel.
Flood Fill with color #FC7024. Selections, Float.
Effects, 3D, Cutout as before, but change color to #883904. Deselect.
New Layer. Call it P-face. Selections,
Load from disk, pface.sel.
Flood Fill with color #FFE119. Deselect.
New Layer. Call it P-lines. Selections,
Load from disk, plines.sel.
Flood Fill with color #BB4403. Deselect.
New Layer. Call it Knob. Selections,
Load from disk, knob.sel.
Flood Fill with color #9E6444. Deselect.
New Layer. Call it P-strings. Selections,
Load from disk, pstrings.sel.
Flood Fill with color #47713D. Deselect.
Close all layers except those pumpkin layers. Layers, Merge, Merge Visible. Call it Pumpkin.
New Layer. Call it Leaf. Selections,
Load from disk, leaf.sel.
Flood Fill with color #0E8009. New Layer. Color #0F6608.
Make some darker green color on the leaf.

Effects, Blur, Gaussian Blur3. Deselect.
New Layer. Call it Veins. Selections,
Load from disk, veins.sel.
Flood Fill with color #0E8009. Deselect.
Close all layers except those leaf layers. Layers, Merge, Merge Visible. Call it Leaf.
Stand on Layer Pumpkin. Effects, 3D, Drop Shadow as before, but change color to black.
Stand on Layer Leaf. Effects, 3D, Drop Shadow as before.
If you want to decorate your little witch
with a spidersweb, use the one in your zip.
Copy and paste it as a New Layer.
Belive it or not, your nice little witch is now ready for Halloween.
